Thursday, July 16, 2009
We've Moved!
check out our swanky new address: healthygirlcooking.com! there are some exciting new changes on the horizon for healthy girl cooking...stay tuned!
photo credit: Patrick Cline
Monday, July 13, 2009
Healthy Girl Grilling
It's summertime, y'all! I don't know where you live, but here in Boston I've seen enough rain to last me a lifetime. I finally got the chance to do some grilling last weekend (or, rather, to be a marinade-making 50's housewife while my boyfriend manned the grill.) Below are a few of our successes: Shrimp Kabobs with Red Pepper and Pineapple; Asian-inspired Eggplant, Juicy 'Bella Burgers, Mustardy 'Gus, and Magnum Grilled Cheese.
Shrimp Kabobs with Red Pepper and Pineapple
file under: Seafood; Dairy-free; Gluten-free
for each person, use: 1/3 lb. raw shrimp, 1/2 red pepper, 1 1/2 cups chopped pineapple
olive oil, salt and pepper
1. Wash, peel and de-vein shrimp. On skewers, alternate shrimp, pepper and pineapple pieces.
2. Using a brush, dab shrimp and pepper pieces with olive oil. Sprinkle with salt & pepper.
3. Grill kabobs until shrimp are bright pink.
Asian-Inspired Eggplant
file under: Vegetables; Dairy-free; Vegetarian; Vegan
1 large eggplant
4 teaspoons soy sauce
4 teaspoons rice vinegar
1 teaspoon sesame oil
3 cloves pressed garlic
1/2 inch piece of fresh ginger, minced
Mix marinade ingredients. Brush over eggplant pieces. Allow to sit for 30 minutes
To grill, wrap eggplant pieces in foil and cook until soft.
Juicy 'Bella Burgers
file under: Vegetables; Vegetarian; Vegan; Dairy-free; Gluten-free
This sauce is my boyfriend Noah's burger marinade. It makes meat and mushrooms incredibly juicy. Noah refuses to violate his creative process by measuring specific quantities of any ingredient. I finally convinced him to use a vague "part" scale, so good luck recreating the recipe...just trust your intuition! Serve these bad boys alone or on a bun with your favourite burger fixins.
4 Portabella caps
4 parts A-1 sauce
2 parts Balsamic vinegar
2 parts Dijon mustard
1 part Olive Oil
"Abuncha sprinkles" Thyme
"Ditto" Rosemary and Black pepper
Brush mushrooms generously on both sides with marinade. Allow to sit for 30 minutes. To grill, wrap in foil to maintain moisture and cook until soft.
Mustardy 'Gus
file under: Vegetables; Vegetarian; Vegan; Dairy-free; Gluten-free
2 large bunches asparagus
2 tablespoons olive oil
1/4 cup balsamic vinegar
1/4 cup dijon mustard
Lay asparagus pieces in a baking dish, layering if need be. Mix marinade and pour over asparagus. Allow to sit for 30 minutes. Grill, unwrapped, until asparagus in nicely charred.
Magnum Grilled Cheese
file under: Vegetarian
I made this sandwich for my vegetarian friend Sam. For the ultimate veg delight, construct the sandwich using generous portions of the ingredients listed below and place it directly on the grill. You can also toast the bread for an indoor treat on a rainy day, or if you don't have time to get the grill going.
For each sandwich: 2 slices whole wheat bread; 2 slices sharp white cheddar; 3 thick slices ripe tomato; 1/3 avocado; 5 spears Mustardy 'Gus.
Labels:
Dairy-free,
Gluten free,
Grilling,
Sandwich,
Seafood,
Vegetables
Thursday, July 2, 2009
The Healthy Girl Gentle Dietary Cleanse: A Complete Meal Plan
You may have read my recent entry about beginning a gentle cleanse to get back on track after too much unhealthy eating. The intention behind this five-day project was to give my body a rest--and thank it for all the amazing things it does for me!--by feeding it only the most nutritious, easy-to-digest foods. That meant avoiding:
meat
fish
dairy
soy
wheat/gluten
caffeine
alcohol
processed foods
all chemicals, including preservatives
...and enjoying plenty of:
fresh and dried fruits
veggies
beans and legumes
nuts
eggs
gluten-free grains like quinoa and brown rice
caffeine-free, all-natural teas
kombucha! (an expensive delight I allowed myself to splurge on during my cleanse)
Though a little higher in fat than the diet I normally try to eat, my cleanse diet consisted of heart-healthy, easy-to-process fats (like the unsaturated kinds found in nuts, which are thought to lower cholesterol.) I feel the need to mention that the elimination of gluten is completely unrelated to the carb phobia that has plagued our culture in recent years; I simply avoided this natural element during my cleanse because it takes more work for our bodies to process.
What follows is a five-day meal plan that you can use (and tweak to your needs, mind you) if you'd like to embark on the Healthy Girl Cleanse! Please remember that I'm not a medical professional, so you may want to check with your physician to make sure that this cleanse is right for you. Also, please don't feel that anything about this cleanse supports starvation as a means of toxin-flushing; I'm skeptical that such claims hold any merit, and would never encourage you to go hungry. My meal plan is designed around eating smallish amounts every 3 hours or so in order to feel satiated and energized at all times. If you find that the portions I list below are filling you up too much or leaving you really hungry, listen to your body and give it what it needs--every body requires a slightly different amount of fuel!
Finally, don't be discouraged if you feel that a gentle cleanse is not right for you. Perhaps just integrating a few snack or meal ideas into your repertoire would be fun! My meal plan includes many recipes that you can find on Healthy Girl, along with others that are self-explanatory (I hope.) Please see the shopping list for an easy grocery store guide; keep in mind that I've tried to include a lot of variety in this meal plan, but by remaking a few recipes you're really into, like I did, you can make this cleanse more budget-friendly. As always, feel free to comment publicly or email your questions, comments and criticisms to healthygirlcooking@gmail.com. I hope to hear from you...happy cleansing!
Day 1
Breakfast
Apple-Spinach juice
Hard-boiled egg with freshly ground pepper and kosher salt
Snack 1
Sliced banana with chopped red apple, 2 TBSP walnut pieces and a squeeze of honey
Lunch
Egg in a Quinoa Nest
Snack 2
Handful of almonds with 5 pieces dried apricot
Dinner
Mexican-style baked potato with black beans, roasted corn, steamed broccoli, and salsa
Snack 3
Fresh pineapple slices
Day 2
Breakfast
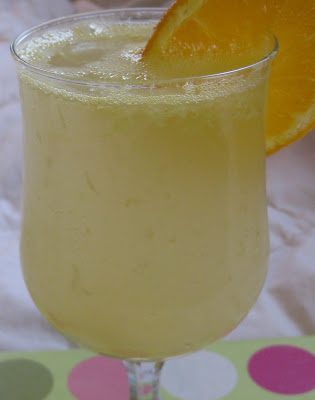
Creamsicle juice (juice oranges first along with one extra orange, setting aside the extra orange juice to use in a smoothie later)
Handful of almonds
Snack 1
1/4 cup hummus with carrot and cucumber slices
Lunch
Quinoa and Roasted Veggie Salad, dressed with 1 tsp olive oil and a squeeze of lemon juice
Snack 2
Smoothie with fresh orange juice, banana, and pineapple
Dinner
1 cup cooked red lentils with roasted broccoli, zucchini and squash (make extra for snack tomorrow)
Snack 3
Baked sweet potato topped with honey and cinnamon
Day 3
Breakfast
4 egg whites scrambled with sauteed mushrooms and sliced tomato
Banana
Snack 1
Leftover lentils with veggies
Lunch
Mixed greens with sliced avocado, shredded carrots, black beans and salsa
Snack 2
Roasted Sweet Potatoes with Brussles Sprouts
Dinner
Quinoa-Stuffed Peppers (omit veggie sausage and add extra beans; make extras for lunch tomorrow!)
Snack 3
Peach and/or pear slices
Day 4
Breakfast
Egg in a Quinoa Nest
Snack 1
Creamsicle Juice
Lunch
Leftover Quinoa-Stuffed Peppers
Snack 2
Roasted sweet potato with brussles sprouts
Dinner
Lentil Burgers
Snack 3
Peach or pear slices
Day 5
Breakfast
4 scrambled egg whites with sauteed mushrooms and tomato slices
Peach or pear
Snack 1
Sliced banana with chopped fuji apple, 2 TBSP walnut pieces and a squeeze of honey
Lunch
Hummus and Veggie plate with carrot and cucumber slices, raw broccoli florets, mixed greens drizzled with olive oil and lemon juice, and 1/2 cup hummus
Snack 2
Handful of almonds with 5 dried apricots
Dinner
Bowl-o-Burrito
Snack 3
Pineapple slices
Other additions you may enjoy:
*Peppermint, ginger, chamomile, or any of your favourite caffine-free teas (iced or hot)
*Kombucha, a refreshing, cleansing drink made from mushroom-like cultures
*Hot water with lemon and any combination of the following: cayenne pepper, honey, cinnamon, ginger root (as suggested by a very helpful reader!)
*Popcorn--but only the homemade kind, involving nothing but corn kernels and a little olive or canola oil!
P.S. If you're a coffee freak like me, it may be less torturous to ween yourself from The Sauce prior to beginning your cleanse. You can do this by cutting down and/or switching to green tea. I wouldn't wish going cold turkey on my worst enemy.
The Healthy Girl Cleanse: A Complete Shopping List
Below is a shopping list for the meal plan above--a plan bursting with variety (read: a little rough on the ol' wallet.) This shopping list is meant to be a guide that you can tweak to your liking and financial needs. I was perfectly happy repeating the meals and snacks I like the most, and I encourage you to do the same to get the most bang for your buck!
Fruits
3 large oranges
2 granny smith apples
3 fuji apples
5 bananas
1 pineapple
3-4 pears and/or peaches, or any other fruit you'd like to snack on
1 package dried apricots
1 large lemon
ginger root
Veggies
1 10-oz packages fresh spinach
2 medium tomatoes, or 1 pint cherry tomatoes
2-4 bell peppers, depending on size
2 avocados
1 baking potatoes
3 medium sweet potatoes
2 large heads broccoli
1 cucumber
3 zucchinis
3 summer squash
2 bags whole carrots
about 8 button mushrooms
about 10 brussles sprouts
1 package frozen corn
1 package frozen spinach
1 bag salad greens
...in many of my recipes, these veggies can be swapped for others you might prefer (try asparagus with scrambled eggs or roasted eggplant on a salad, for example; don't be afraid to experiment!)
Beans, Nuts, Legumes & Eggs
1 dozen eggs
1 can black beans
1 package black lentils
1 package red lentils
1 package walnut pieces
1 package raw almonds
Grains
1-2 packages quinoa
1 bag brown rice (if you'd like to substitute rice for quinoa in some recipes)
Packaged Goods
1-2 containers organic hummus*
1 jar organic salsa*
1 bottle agave or raw honey
cinnamon
Lara bars (HG's favourite raw, vegan, gluten- and soy-free bars for easy on-the-go snacking!)
*Buying organic packaged goods ensures that they are preservative-free.
Time-saving tips for the kitchen:
*When you have time to spare--even 10 minutes--check out your meal plan and do a little prep work for tomorrow. Chop your whole pineapple at once and store the pieces in a covered container in the fridge; that way, you can grab a handful for your smoothie or throw together a totable snack. The same strategy goes for cooking: this meal plan involves a lot of roasted veggies, so when you have time, chop 2 days worth of veggies and roast them all at once, storing the leftovers in air-tight containers or ziplock bags. I also included a lot of quinoa, which I like to make in big batches and draw from all week long.
*Keep a big ziplock full of nuts and dried fruit (or several individual ones, if you have trouble with portion control) in your purse, car or desk drawer for easy pre-made snacking.
*All of the prep work and cleaning involved in juicing can be time-consuming, so do anything you can beforehand, like peeling carrots and oranges and washing spinach. Prepped veggies and fruits can wait for you overnight in the fridge.
Apple-Spinach Juice
I've come across plenty of green juice recipes that involve all kinds of ingredients. This one keeps it super-simple and tastes absolutely delicious! You can play with the ratio of spinach to apple to make your juice tarter (more apple) or milder (more spinach.)
Packed with vitamins A and C, calcium and iron, this fresh juice is a great natural source of energy, as your bod can absorb the vitamins and minerals almost immediately. I suggest drinking some first thing in the morning or right after a workout.
Ingredients (1 large glass):
2 medium granny smith apples
1 10-oz bag fresh spinach
Wash and dry produce and core apples. Give everything a whirl in your juicer and enjoy right away.
Tuesday, June 30, 2009
Lentil Burgers
Discouraged after many attempts at veg-friendly mushroom meatballs, I turned my attention to a similar goal of making a substantial meal out of meat- and soy-free ingredients. I worked on these lentil burgers during my 5-day cleanse (full meal plan and tips coming soon, I promise!) so they had to be gluten- and dairy-free as well, and made from easy-on-the-bod ingredients.
This is still a work in progress; like the meatballs, I think my lentil burgers would incite more lip-smackin' if I were more generous with the oil. Feel free to tweak the following recipe at your leisure--but only if you share your thoughts and suggestions!
Ingredients (makes 6 smallish burgers):
1 small white onion, chopped
2 cups finely chopped carrots (or about 1-1/2 cups shredded)
3 cloves garlic, crushed or minced
1-1/2 cups cooked black lentils*
1 egg
1/4 tsp. cumin
salt and pepper to taste
olive or canola oil for cooking
*Check your local Trader Joe's; I bought a package of pre-cooked black lentils at mine that were perfect for this recipe!
1. Combine all ingredients in your food processor (if your machine is small, you may need to do this in two batches.)
2. On a cutting board, form balls with the batter. You'll want them to be small enough that when you flatten them in the pan, they'll be smaller than hamburger patties.
3. Warm a few drops of oil in the frying pan over medium heat. Add the first batch of lentil burgers and flatten them a bit with the back of your spatula. Cook the same way you'd cook pancakes--until each side is lightly browned.
4. Serve your burgers with slices of avocado and tomato and a side of sauteed veggies. I ate mine with garlicky kale--yummy!
Labels:
Dairy-free,
Dinner,
Experiments,
Gluten free,
Vegetarian
Wednesday, June 24, 2009
Chilled Melon Soup for Summer
I'm proud to bring you another recipe from my mom--radical babe, inventress, and maker of fantastic eats (like Scrambled Tofu with Portabellas.) This refreshing summer soup is perfect for a leisurely outdoor brunch or as a quick meal on a hot day. I love the simplicity of the dish--it's a breeze to make and to transport, but can also make an elegant addition to a dinner party or luncheon. Mama says:
"This soup can only be as good as the melons--they must be very ripe! Tap on the melon with your fingertips; it should sound like a hollow thump. Honeydew should be very pale green with hints of yellow."
Ingredients
Yield: about 5 1/2 cups; 5 (or 6 small) servings.
1 large honeydew or cantaloupe melon, peeled & cut into small chunks*
Grated rind of 1 lime
Juice of 1 lime
1/2 cup non-fat Greek yogurt
1 Tblsp finely chopped mint leaves
*My preference is to use 1 ½ recipe, using a whole honeydew & ½ cantaloupe.
1. For optimal presentation, choose individual serving bowls that can be chilled in the freezer, & store them there for a couple hours before serving.
2. In a food processor or blender, process melon chunks until smooth; use a low setting to avoid building up froth.
3. Add remaining ingredients and blend until well mixed.
4. Chill thoroughly and scoop into frozen bowls, garnished with sliced blueberries and mint sprigs if desired; serve immediately while bowls are frozen. Best served within 24 hours.
Labels:
Dinner,
Entertaining,
Fruit,
Gluten free,
Lunch,
Soup,
Vegetarian
Thursday, June 11, 2009
Latest Obsession: Egg in a Quinoa Nest
This concoction is the result of my search for easy-to-digest, wheat-, dairy-, soy- and meat-free sources of protein to eat during my cleanse. The best thing about this dish is that it's easy to assemble quickly if you have a batch of cooked quinoa in the fridge. On second thought, the best thing about this dish is its TOTAL DELICIOUSNESS. When I fall in love with a food, I want to eat it all the time, and that's exactly what's been happening with this bowl-o-goodness--I've had to force myself to eat anything else! It's easy to transport sans egg, which makes this concoction a perfect weekday lunch.
For a lighter breakfast or a super-energizing afternoon snack, follow the recipe below. For a heavier meal, increase the amounts of quinoa and black beans and add a second egg. I prefer to use poached or over-easy eggs; the gooeyness really pulls everything together! If you're trying to cut fat and calories, scrambled egg whites make a good substitute.
I've included the nutrition facts below (calculated to the best of my knowledge using product labels and internet sources) to give you an idea of how well-rounded this dish is! Besides being super high in protein and fiber, quinoa is also a great source of B vitamins, iron and zinc.
Ingredients (one serving):
1/2 cup cooked quinoa
1/4 cup black beans, drained
1/4 cup hummus
1/2 cup thawed frozen spinach or steamed fresh spinach
1 egg, poached or over-easy
black and crushed red pepper to taste
additions: roasted corn, chopped avocado and tomato
1. Stir quinoa, spinach, black beans and hummus together in a bowl. Create a nest in the center of the mixture for your egg.
2. Heat water in a small saucepan. When water begins to boil, stir from the center to create a whirlpool. Drop eggg into the whirlpool and allow it to cook for about one and a half minutes.
3. Drop egg into the center and marvel at how cute your breakfast is. Add seasoning to taste. Mix everything together and enjoy!
Nutrition facts:
Calories 364; Fat 16.5 g; Saturated fat 1.5 g; Cholesterol 215 mg (71% RDV); Carbohydrates 45 mg (13.5%); Fiber 10.6 g (41%); Protein 21 g; Vitamin A 21%; Vitamin C 9%; Calcium 17%; Iron 27%
Labels:
Dairy-free,
Dinner,
Gluten free,
Latest Obsessions,
Lunch,
Vegetarian
Wednesday, June 10, 2009
The Fatigue Continues...
Even my bones feel exhausted this week. Is it just the caffeine withdrawal, I wonder, or am I missing some essential energy-boosting nutrients? My protein intake has been lower than usual, so today I'm going to eat plenty of egg whites, lentils and beans, and see if that makes a difference. Hooo boy, am I looking forward to my cup of Reward Coffee on Friday morning!
Tuesday, June 9, 2009
Death by Coffee Deprivation
I have to be honest: I was not expecting a week of no caffeine to be so horribly miserable. I began my cleanse on Sunday morning, with a long day ahead of me. Getting through the morning was the easy part; I felt like I was on sedatives. It wasn't until late afternoon that the caffeine withdrawal headache began, and I felt icky all evening. I mentally repeated my mantra: "this headache is the toxins leaving my body." When I finally got home, I melted into bed. After almost ten hours of sleep, I was still so exhausted from caffeine withdrawal that I could barely haul myself out of bed on Monday morning! Willpower is not my forte, so I am giving myself mad props on my third day of coffee deprivation. It's becoming easier, ever so slowly, but I still feel exhausted. Kombucha, while an expensive splurge, has been a delicious and natural aid for my fatigue. If you've never tried this delish tea fermented from a mushroom-type organism, you should give it a try; the health claims, which date back to early Chinese dynasties, include digestive, metabolic, and cleansing properties. Though it is caffeine-free, I feel a gentle kick in my step after I drink a bottle!
Monday, June 8, 2009
Cleanse Your Bod with Healthy Girl!
The whirlwind that has been my life over the past two months has not been kind to my body; I've been taking advantage of my free shift meals at work (which generally involve an abundance of meat and cheese, with hardly a vegetable in sight,) hardly finding time to exercise and sleeping restlessly. I need to get back on track, and the best way to do so is to give my body a break from the insanity I've been putting it through. This means avoiding everything that takes hard work to process: wheat, dairy, soy, meat, caffeine, alcohol, and preservatives and other chemicals. What does that leave, you ask? Fruits, vegetables, beans and legumes, nuts, eggs and quinoa. You'd be surprised how much variety you can squeeze out of this list!
Make no mistake: the Beyonce lemonade-and-cayenne-pepper "cleanse" is not my style. This regimen has gained a lot of popularity lately, much to my dismay. Supposedly, drinking nothing but water with lemon, maple syrup and cayenne can flush out toxins; I know people who have done it for a week or longer and swear by it. I can't get beyond the scientific fact that when you don't consume enough calories, your body goes into emergency mode to conserve its resources. How is telling your body that you're dying a cleanse?? No, no, I can't get behind that at all; it looks far too much like anorexia to me. My cleanse is about achieving satiety from the highest-quality, easiest-to-digest foods. Consuming organic, locally-produced food is always best, of course.
This week I'll be sharing my notes as I collect ideas for cleansing recipes and meal ideas. Next week, I'll create a week-long meal plan and shopping list that you can follow if you want to do your own cleanse. I'd love to hear all your thoughts and questions about cleansing!
Wednesday, June 3, 2009
Two-Minute Berry Banana Smoothie
If I was a lady who embroiders, I would make a plaque to hang in my kitchen that says "Smoothies are made from angel's kisses and god's love."There are plenty of imposters out there masquerading as your best smoothie friend; if you read between the lines at any smoothie joint, you'll realize that the primary ingredient in these jokers is sugar, and synthetic ingredients often make a guest appearance. Making your own smoothie at home is so simple, and you can control exactly what goes into the mix. This is one of my favourite combos. It's great with fresh berries, but I like to use frozen because they're so easy to keep around and they make my smoothie nice and cold.
This is my go-to breakfast or post-workout snack when I'm in a hurry. I'm always running late no matter how much time I leave myself, so having this smoothie ready to go is a big help. I like to fill the blender with the ingredients and leave it in the fridge--you can even do this the night before--that way, all I need to do is give it a whirl, and I have something sustaining to sip on while I get ready!
Protein powders have become a popular smoothie addition since I was a kid, but I'm wary of them; the ingredient list is too long and complicated for my comfort level. Besides, unless you're training to be Miss Muscles USA, you don't need to eat 100 grams of protein a day; 50-60 is just fine for most people (check with your doctor to confirm your personal nutritional needs.) One of these giant smoothies, which packs two servings of fruit, also contains about 20 grams of protein from the yogurt and milk--natural sources that I feel confident feeding my body!
One final note: when choosing yogurt, always check the sugar content. An unassuming, single serving container can pack as many as 30 GRAMS! I always use fat-free plain or Greek yogurt, which contain the lowest amount of sugar; if these are too bitter for you, try adding a squeeze of honey!
Ingredients (one giant smoothie):
1 banana
3/4 cup fresh or frozen berries*
1 cup fat-free plain yogurt
1/2 cup skim milk
*If you're using fresh berries, you may want to start off this recipe by crushing some ice cubes in the blender to make your smoothie nice and cold!
Combine all ingredients and blend. Voila!
Labels:
Beverages,
Breakfast/Brunch,
Gluten free,
Smoothie,
Snacks,
Vegetarian
Monday, June 1, 2009
Baked Halibut with Pineapple-Black Bean Salsa
I have a fish-crush on halibut. Its lower-mercury content and potatssiumy goodness on top of its versatility makes me <3 it. I had hoped to use halibut in my dad-inspired recipe for Pomegranate Almond-Encrusted Flounder, but alas, the fish counters were bare. When I stumbled upon some steaks in the frozen food aisle of Trader Joe's last week, you can only imagine my delight! (I later learned that "steak" means "you will have to pick bones out of me," so I suggest you use fillets if possible!) This dish is not only yummy and super easy to make, components also make it absolutely fantastic for you! Black beans add to the very lean protein in the halibut and provide a solid dose of your heart's best friend, fiber. An extra exciting nutritional tidbit: a cup of this salsa contains about half of your daily allowance of manganese, a mineral in pineapple that is essential for healthy skin.
This salsa is very easy to make. Feel free to make adjustments; I used some ingredients from my pantry and fridge that were handy. Avocado would make an interesting and heart-healthy substitute for black beans, and mango could easily replace (or add to?) the pineapple component. If you don't have any shallots, you can use red onion for a more pungent kick. And finally, a fresh jalepeno would work just fine (if not better!) as a substitute for the canned green chilis I grabbed from the pantry.
I served my halibut absolutely smothered in salsa; I couldn't get enough! A side salad rounded out the meal nicely, but a little brown rice would make a nice addition too!
Ingredients (serves 2):
2 halibut steaks, or about 2/3 lb. filets
1/2 a fresh pineapple, or an 8-oz. can
1 cup black beans
1 red or orange bell pepper, coarsely chopped
1 shallot, chopped
2-3 TBSP canned green chilis or minced jalepenos
juice of one lime
1-2 tsp olive oil & lemon slices for baking
salt & pepper to taste
1. Preheat oven to 350º. Place fish on a baking sheet and dot with olive oil. Place a lemon slice on top of each piece, and sprinkle with salt and pepper. The baking time will depend on the thickness of your fish; 20 minutes worked well for my steaks, but you'll need 15 or so for fillets.
2. While the fish bakes, mix pineapple, black beans, shallot, pepper, and jalepenos. Squeeze lime over your salsa and mix well.
3. Top fish with a big ol' serving of salsa and enjoy! If you have leftover salsa, cover the bowl and refrigerate--the flavors will be even better tomorrow, and you can add it to a salad or turkey sandwich!
Thursday, May 21, 2009
Avocado Toast with Nutritional Yeast
If you don't have a stash of nutritional yeast in your pantry, run to your local health food store and stock up on these flakes of gold. Nutritional yeast is a vegan's dream, but non-vegans should know about its all-around loveliness too. It's packed with protein-- and has an interesting, slightly nutty flavour that goes a long way. When I was little, we'd sprinkle a couple of tablespoons on popcorn for a healthy alternative to butter.
For a yummy snack that's high in protein, fiber and heart-healthy fats (healthy girl's secret recipe for satiation,) sprinkle a tablespoon of yeast on whole-grain toast and add slices of 1/3 of an avocado. Sprinkle with freshly ground pepper and kosher salt. You'll be in heaven!
Thursday, May 14, 2009
Mushroom Meatballs: The Eternal Project
Lord, y'all. I have been trying to make vegetarian "meatballs" outta mushrooms for quite some time, and dangit if those 'shrooms don't want NOTHIN to do with no balls. My recent third and fourth attempts at mastering the concept yielded some interesting results--the third batch came out looking like sausage patties, while the final batch, the closest in shape to real meatballs as of yet, tasted too bready--nothing I'd bring to a social event, that's for sure.
The base for these meatballs has remained the same: tons of baby bellas and a healthy dose of walnuts. There's generally wheat germ involved to up the texture quotient, and sometimes a little egg and parmesan. A few other ingredients have made guest appearances--whole wheat flour, fresh herbs, some skim milk.
My goal has been to create a soy-free, veggie-based meatball--preferably a vegan one--that could stand front and center in an Italiany meal or class it up on an hors d'oeuvres platter (they're pictured atop thinly-sliced steamed zucchini and squash, with a little tomato sauce and mozzarella.) My experiment will continue, gosh darnit, until I figure out the texture/flavour conundrum! Suggestions are welcome...
Tuesday, May 12, 2009
Scrambled Tofu with Portabellas
This recipe comes from my lovely mom, who conceived of and photographed the dish. When I decided to become a vegetarian at age 11, both my parents were very obliging, and the whole family started eating a lot more tofu and veggie-centered dishes. My ever-inventive mom came up with a million different ways to nourish me. Scrambled tofu was my Sunday brunch favourite, but it's great for dinner too! I'm a big fan of portabellas, which are really the star of this dish. A little sesame tahini goes a long way in giving this scramble its unique flavour, though can make this dish sans tahini if you wish; it will still work.
Last summer, I decided to get to the bottom of the decade of mysterious stomach problems I'd been dealing with. Having known a few people with an intolerance to dairy and/or wheat, I was worried that I'd discover that the same problem was at the root of my troubles. After an extensive project that involved removing possible offenders from my diet and documenting the experiment in a food journal, I discovered that neither dairy nor wheat was giving me my stomach aches; it was tofu! I now manage to stay away from anything that includes soy protein, but I often crave my fave tofu dishes, so you'll have to enjoy this one for me!
Ingredients:
3 tsp olive oil, divided
½ c chopped onion (or more, to taste)
½ c chopped red & green bell pepper (or more, to taste)
1 clove garlic
½ lb sliced portabella mushrooms
1/3 c sesame tahini
2½ to 3 tsp low-sodium tamari to taste (sub soy sauce if you don't have it)
1 lb light silken or firm tofu
Salt & fresh-ground black pepper, to taste
1. Heat ½ tsp oil in non-stick frying pan. Add pepper & chopped onion and sauté, adding garlic after a few minutes, until the vegetables just begin to get tender. (Don’t overcook; they should still have a slight crunch.)Remove to bowl & set aside.
2. Heat 2 tsp oil in same pan without washing, add mushrooms. Sprinkle lightly with salt and fresh-ground pepper. Sautée until tender, drizzling with a small amount of oil if necessary to keep them moist. Remove from heat & add to cooked vegetables.
3. Drain tofu, place between several layers of paper towel, and press to remove extra water.
4. Pour tahini into same pan without washing, stir in tamari. Add tofu and over medium heat, mix into tahini & tamari, chopping tofu into small pieces without mashing.
5. Add vegetables and mushrooms, turn gently with spatula until heated through. Serve at once with crusty whole grain bread and a favorite green vegetable.
Variations: try adding any lightly-cooked vegetables, chopped nuts or pine nuts-- but portabellas are the key ingredient, adding a full, deep flavor that can’t be beat.
Labels:
Breakfast/Brunch,
Dairy-free,
Dinner,
Tofu,
Vegan,
Vegetarian
Wednesday, May 6, 2009
Breakfast for Superwoman
I've always been a big oatmeal person; I love how it "sticks to my ribs," as my mother would say, keeping me satiated til lunch. Experimenting with toppings is fun, but lately I've found a combo that I love so much, I eat it every single morning. Redundant, perhaps, but hey. I'm a woman who knows what she likes. I wanted to share my current breakfast obsession with you because besides being delicious, it is a nutritionally perfect way to start the day. Packing tons of fiber, protein, and calcium, as well as a healthy dose of omega-3's and two servings of fruit, this dolled-up oatmeal kicks ass and takes names. I rarely take the time to include nutrition facts in my recipe posts because computing them is time-consuming, but I've calculated them for this recipe (to the best of my knowledge) because I want you to see just how great this oatmeal is for your bod! The fat comes almost entirely from the walnuts, so don't be put off--a reasonable dose of heart-healthy mono- and polyunsaturated fat like that in walnuts is great for your heart!
P.S. When it comes to choosing oatmeal, always buy a canister rather than individual packets. Steel-cut, plain oats and multigrain hot cereal are all great choices; just make sure that grains are the only ingredients. Flavoured oatmeals are the equivilant of a bowl of lucky charms or a cinnamon roll--the abundance of sugar and chemicals means that the bad outweighs the good. The sugar in this recipe, on the other hand, comes entirely from the fruit and yogurt (plain yogurt contains less sugar than flavoured, which can be outrageously sugary.)
Ingredients (one serving):
1/2 cup oats (dry)
1/2 cup fat-free yogurt, plain or greek
1 banana
1 small apple, chopped
2 TBSP walnut pieces
cinnamon to taste
optional: a drizzle of honey or agave if you have a sweet tooth
1. I like to cook a banana into my oatmeal to make it creamy and sweet. To do so, mix small pieces of banana with 1/2 cup oats and 1 cup of water. Heat in the microwave or over low heat on the stove until the mixture reaches your desired consistency.
2. Top oatmeal with 1/2 cup of yogurt, apple and walnut pieces. Dust with cinnamon, and add a drop of honey if you wish!
Nutrition facts
calories 485; fat 11g; cholesterol 5mg; potassium 270mg; carbs 88g (30%); fiber 12g (47%); sugars 35g; protein 16g; vitamin A 3%; vitamin C 28%; calcium 27%; iron 16%
Friday, May 1, 2009
Chili Chicken Salad
Scrounging for salad ingredients in my pantry and fridge (and sometimes freezer!) always makes for a fun experiment. This salad, with its avocado, roasted corn and spicy chicken, is Mexican-inspired. Take advantage of the warm weather and try grilling your chicken! Or, if you're cooking it on the stove, steal my boyfriend's trick of mixing a little olive oil with a plentiful dose of your favourite hot sauce (we like Trader Joe's chili sauce--it's smoky and tangy without being over-the-top hot) and cook the chicken in this delish mixture. This salad would be delicious with black beans for some extra protein or as a substitute for the chicken if you don't eat meat. I added sunflower sprouts, which make a great addition to any salad--they're crunchy and full of minerals like calcium, iron, potassium and magnesium.
Ingredients (makes 2 salads):
1 package salad greens
1 package sunflower sprouts
2/3 avocado, thinly sliced
1 cup frozen corn kernels
2 small or medium tomatoes
2/3 lb. chicken breast
hot sauce and dressing of your choice to taste (I like Annie's Organic Cowgirl Ranch)
1. Preheat oven to 400º. Wash and dry veggies. Slice tomatoes and avocado.
2. Spread corn onto a baking sheet and roast for about 15 minutes. You can heat it in the microwave instead to save time, but roasting gives the corn a wonderful flavour.
3. Slice chicken into bite-size pieces and cook. Top greens with corn, chicken, tomato and avocado. Top with a little dressing and enjoy!
Wednesday, April 29, 2009
Latest Obsession: Almond Cheese
Cheese is my biggest weakness. We all know that in moderation, it's great for you--full of calcium and protein. But the fat content and tummy-clogging properties means, sadly but truly: mo' cheese, mo' problems.
Last week when I was making the rounds at Wholefoods, something caught my eye in the dairy aisle. You guessed it: almond cheese. I've been wondering if a product like this exists; I'm always interested in dairy alternatives, but soy is too hard for me to digest, and that pretty much only leaves rice products (I'm not generally a fan, but rice milk ice cream and chocolate bars are surprisingly yummy!) So when I discovered that almond cheese is soy-free, very low-fat, and just as high in protein and calcium as regular cheese--and processed minimally without preservatives(!)--I had to give it a try! This "cheese" comes in two flavours: cheddar-style and mozzarella-style; I'm partial to the cheddar, which I added to an open-faced hummus and avocado sandwich--delicious!
The almond cheese I found is made by Lisanatti--a company that makes dairy-alternative cheeses--and is gluten-free, though it DOES contain casein, a milk protein that makes the product unfriendly for vegans and those on a dairy-free diet. Though the package doesn't lie about this cheese being shreddable and tasting great (ok, "pretty good" might be a better description) I take issue with the claim that it melts--when I tried to make cheese toast, I ended up with a weird plasticy substance that stuck to the backs of my teeth.
Almond cheese has a somewhat different texture and flavour than cow's cheese, of course. As long as you don't expect a perfect imitation, I don't think you'll be disappointed. Adding a couple slices to a sandwich or sprinkling some cubes over a salad is the best way to go.
Monday, April 27, 2009
Healthy Girl's First Interview!
My friend Ashley Stephenson, a talented photographer based in Raleigh, NC had a few questions for me about Healthy Girl Cooking. Talking with Ashley about Healthy Girl's mission and my plans for the future was fun! Read our interview (and check out Ashley and her husband David's fabulous work!) on their company's blog. While you're at it, check out Story Photographer's website as well!
Friday, April 24, 2009
Frozen Grapes
I know, I know, you're probably thinking, "I have neither the time nor the culinary prowess to put grapes in the freezer." But girl, I believe in you!
This is one of my favourite warm-weather treats. It ain't no chocolate ice cream, but frozen grapes make for a delightfully sweet-tart munchie. Purple, green--they're both delicious. Just make sure you buy seedless grapes and wash 'em well. Pop 'em in the freezer and go about your biz while they freeze. My favourite way to enjoy these lil guys is when they're mostly frozen but just a tad soft--otherwise they can be a little hard on the ol' teeth.
Wednesday, April 22, 2009
Tummy Taming Ginger Soda
When we were little, my brother and I were only allowed to drink soda to settle our stomachs when we were sick. Godless child that I was, my first prayer, circa age 4, went like this (direct quote, overheard by my mother): "Dear God, please let me throw up thirteen times in the night so I can drink Coke."
Nowadays, having recovered from my childhood deprivation of soda (and white bread, fruit roll-ups, processed peanut butter and cereal with more than 8 grams of sugar) I've returned to my roots and only drink soda to settle an upset tummy. Though my mom claims that carbonation helps soothe a stomachache, it's my opinion that sodas that do not contain real ginger are pretty useless in the tummy-settling department. This afternoon, feeling a little yucky and not up for a natural soda hunt, I decided to experiment with what I already had in my kitchen.
I always keep a little fresh ginger around; it's great for Asian-inspired dishes (like Vegetable Fried Bulgar,) Creamsicle juice, and baking projects, among other things. To make this soda, I simply grated a one-inch piece of ginger (use a little less if you want a weaker flavor) into a glass and added a 500ml-bottle of sparkling mineral water. The orange slice I used as a garnish got me thinkin', so I added the juice of one half of the orange for a nice vitamin C boost! You don't have to consume all the ginger for it to have a soothing effect; the infusion will help on its own.
As a warm alternative to this fresh, cooling drink, try simmering a one-inch piece of ginger in 1 cup water for about five minutes, then drink as a tea.
Tuesday, April 21, 2009
Easy-Peasy Pesto Shrimp Pizza
I have been on a major pesto kick lately, and I've been brainstorming new ways to get my fix. I made this tortilla-based pizza for lunch today, using some multi-purpose staples I like to keep around: mushrooms, tomatoes, a whole grain tortilla, parmesan cheese (strong enough to add flavour in small, low-fat doses) and frozen pre-cooked shrimp (you can buy a bag for about $6, thaw 'em in 5 minutes flat and throw them into salads, soups, pasta dishes, quesadillas, omelets--anything, really!--for a big boost of lean protein.)
This pizza is satisfying without being too filling, thanks to the nice balance of protein from the shrimp and fiber from the tortilla (make sure you use whole wheat or whole grain to avoid filling up on nutritionally useless simple carbs.) Tomatoes are high in vitamins A, C and K; they're also a good source of lycopene, a cancer-fighter that the body absorbs best along with a little fat (like the olive oil and nutty pesto in this dish.) Mushrooms are densely packed with minerals like selenium, riboflavin, copper and niacin. Add a salad of fresh spinach and mandarin oranges to this already well-rounded meal, and you'll be feelin' great all day long!
Ingredients (makes one single-serving pizza):
1 whole grain tortilla
1-2 TBSP pesto
1 vine-ripe tomato, thinly sliced
about 8 button mushrooms, thinly sliced
2 TBSP parmesan cheese
a handful of medium frozen shrimp, thawed
optional: 1/2 cup frozen spinach for an extra veggie kick (make sure you drain it well!); crushed red pepper
1. Preheat oven to 350º. Place shrimp in a colander and run cold water over them to thaw while you slice your tomato and mushroom.
2. Throw the mushrooms into a non-stick pan and cook until semi-soft. You can drizzle them with a tiny bit of olive oil if you like, but it's not necessary.
3. Place tortilla on a baking sheet and spread it with pesto. You need very little to give it that yummy herb-garlic flavour, but if you're a pesto nut like me, load it up!
4. Add tomato, mushroom, and shrimp, and sprinkle your pizza with a little parmesan. Bake for 15-20 minutes until melty and crisp!
Note: juices from the tomato and mushrooms (and shrimp too, if they're not drained super-well) might collect a bit in the corner of your pizza like they did on mine. Just dab them up with a napkin--or leave 'em be if you don't mind getting a little messy!
Thursday, April 16, 2009
Presto! Pesto
Everything's better with pesto, y'all. In 5 minutes flat, you can make a big batch that will add pizzazz to your cooking all week. Or you can take a tip from the fabulous Amy Sedaris and freeze individual portions in an ice cube tray for later use.
Pesto is traditionally made with pine nuts, but if I don't have any in my pantry, I throw in whatever kind of nuts I DO have rather than spending an extra six bucks at the store. Experimenting is fun--walnuts are my favourite, and almonds are good too. Next on my list to try is cashews! Your pesto will have a slightly different taste depending on the type of nut you use.
Depending on the size of the basil bunches sold at your grocery store, you may need to tweak the amount of the other ingredients listed below to obtain the flavour and consistency you want. Most recipes call for a lot of olive oil, but I use only a drizzle, which makes my pesto super thick and chunky. Pesto-making is not an exact science, so go crazy with the taste tests and come up with your own custom concoction. If you don't eat dairy, you can omit the parmesan; it will still be delish sans cheese!
Stay tuned for a variety of pestoy meal ideas...in the mean time, try your fresh pesto in my latest addiction, Zoe & Zane's Spinach Brownies...MMM!
Ingredients (makes about 1 cup of pesto):
2 large bunches fresh basil leaves
1/2 cup pine nuts, walnuts, almonds, etc.
1-1/2 to 2 TBSP extra virgin olive oil
1/2 shredded parmesan cheese
4 cloves garlic, minced
sea salt & freshly ground pepper to taste
Wash & dry the basil leaves. Throw everything into the food processor and give it a whirl!
Friday, April 10, 2009
Spinach-Artichoke Dip
What in life is better than warm, creamy spinach-artichoke dip? Not much, that's for damn sure. Gooey, cheesy, mayonnaisey--yes, you heard me; I, President of the Mayonnaise-Haters club, can get over my burning revulsion for this treat! I'm all for indulging in the traditional version of this dip now and then, but I had a powerful craving the other day that I knew couldn't be satisfied by a 2-tablespoon serving size (!) From this craving, a healthified (albeit less cheesy) version of spinach-artichoke dip was born, and I ate a whole bowlful without feeling yucky afterwards! Not only is this dip super low-fat, it's packed with vitamins A and C from the abundance of veggies and protein and calcium from the greek yogurt, so you can actually feel good about eating it!
This dip don't quit, so don't limit its serving power to hors d'oeuvres hour. Spread it on a warm whole wheat roll and add grilled chicken breast, a slice of provolone and some vine-ripened tomato for an ecstatic sandwich experience. Add a dollop to scrambled eggs and serve with whole grain toast. Toss it with whole wheat pasta, leftover chicken and olives for a super quick dinner. If you're enjoying it in dip form, make your own healthy and delish dipping devices using my recipes for Pita Chips or Mami Nature's Corn Chips!
Ingredients (makes a big ol' batch for multiple serving purposes):
2 16-oz. bags frozen spinach, thawed
2 cans artichoke hearts in water, drained and chopped
1 cup fat-free greek yogurt (you can alter the quantity to obtain the consistency you want)
1/2 cup fat-free sour cream
1/2 cup shredded parmesan, plus a little extra to sprinkle on top
1/2 white onion, coarsely chopped
2 cloves garlic, minced
1 tsp. olive oil
salt & pepper to taste
additions: chopped tomatoes, crushed red pepper and paprika to garnish
1. Preheat oven to 350º. Thaw spinach in the microwave or by running water over the bag. Drain & chop artichoke hearts.
2. Throw minced garlic & chopped onions into a big pot with the olive oil and cook sautee over medium heat until the onions become translucent. Turn off heat.
3. Add the rest of your ingredients to the pot and stir well. Taste-test for flavor, and add more yogurt if you want a creamier (and proteinier!) dip.
4. Spread dip into a pie pan and bake. I used a glass pan, which requires a longer baking period, so it took about 45 minutes for mine to warm through. I recommend testing the center after about 30 minutes; if it's nice and warm, it's ready to eat!
Thursday, April 9, 2009
Satan in Sandwich Form
I just came across this article on The 8 Worst Sandwiches in America, and I had to share it with y'all (check out the all-time winner, which packs FOUR DAYS' worth of fat!)
I love that restaurants are now required to make their nutrition facts available, but I'm usually not prepared for the results. Recently, my go-to lunch when I don't have time to pack has been Au Bon Pain's hummus wrap; I recently discovered that this seemingly healthy sammy (hummus, lettuce, feta, olives, cucumbers, and sundried tomatoes) has 600 calories and...are you ready? 30 grams of fat! Turns out it's actually one of the most fattening things on their menu; looks can be deceiving, eh? The lesson here is to do your homework and, perhaps most importantly, pay attention to portion size! I'm a food fanatic who finds it impossible NOT to clean my plate regardless of how full I am, so I'm working on not overloading it in the first place.
One of my favourite things to do is create healthier, do-it-myself versions of the not-so-healthy things I like to eat. My Greek Goddess Wrap is lower-fat, veggified version of my Au Bon Pain nemesis. What's your favourite sandwich? Does it need a healthy makeover too? If so, lay it on me!
Tuesday, April 7, 2009
Vegetable Fried Bulgar
Hello gorgeous, I'm bulgar. Have we met? No? Oh honey, are YOU in for a treat! I may be wholesome, but I'm also known for my exotic streak (like when I strut my stuff Lebanese-style in tabouli.) I'm adventurous, and I'll try anything once...
Listen, I know you're tired of plain old rice; besides, she hasn't got half the protein and fiber I have! Couscous? Puh-lease, why would you waste your time (she's not even a whole grain, you know--she's a PASTA!) And sure, my sister quinoa is my nutritional rival, but she's old news! Why don't you put a little bulgar in your bowl, and I'll show you what it's all about. Winkie face!
Ok, I see you're being shy; why don't we get to know each other a little bit? Call me if you're in the mood for a little stir-fry, and I'll show you a good time!
Ingredients:
1 cup bulgar, dry*
1 zucchini
1 summer squash
1 head broccoli
1 red, yellow or orange bell pepper
2 cloves garlic, minced
1" piece fresh ginger, finely grated (or 1/8 tsp. dried ground ginger)
1 tsp. olive oil
soy sauce & siracha (Asian hot sauce) to taste
optional: sliced grilled or pan-fried chicken, tofu or tempeh
*Using two parts water for each part bulgar, fill a pan with both and bring water to a boil. Reduce heat and cover, cooking until bulgar has absorbed water and has a soft texture with a hint of crunch.
1. Cook bulgar; this takes 20 minutes or less depending on the quantity. I recommend making a big batch; you can set some bulgar aside to use in salads, soups and other recipes all week long!
2. Chop up your veggies and throw them in a large frying pan with a little water. Cover and steam (this is my favourite way to cook veggies on the stove top--it's a super quick and fat-free method!)
3. Mince the garlic and grate the ginger. When veggies are soft, pour them into a colander and give the garlic & ginger a turn in the pan, sauteeing them with the olive oil until they become aromatic.
4. Return the veggies to the frying pan and add bulgar. Mix well, adding soy and hot sauce. Throw in some chicken or soy protein if you wish. Voila, y'all!
Friday, April 3, 2009
Zoe & Zane's Spinach Brownies
This recipe comes from Carol, the mother of two fabulous kids I used to babysit. Carol's delicious invention was a hit with Zane when he was a toddler (I think he gets his adventurous streak from his big sister Zoe!) This yummy snack's spinach base provides a healthy dose of vitamins A & C, and the combination of spinach and cheese makes for a calcium-rific treat.
Pesto is fun and easy to make, so if you have a little extra time, I suggest making a big batch to use in this recipe and save for future culinary endeavors. Take a tip from my girl Amy Sedaris and freeze pre-portioned servings of pesto in an ice cube tray; for a quick weeknight meal, boil some whole wheat spaghetti, add one cube of melted pesto for each serving of pasta, and throw in whatever veggies you have in your fridge.
Pesto usually involves pine nuts, but you can use whatever nuts you have in your pantry for a slight twist on the classic. Walnuts are my favourite pesto base; they're full of omega-3's and they make for a strong, delicious flavour!
Walnut Pesto (makes a little over 1/2 cup):
1-1/2 cup fresh basil leaves, chopped
1/4 cup walnuts
2 TBSP extra virgin olive oil
1/4 shredded parmesan cheese
2 cloves garlic, minced
sea salt & freshly ground pepper to taste
Throw everything in your blender or food processor and give it a whirl!
Brownies:
1 bag of frozen chopped spinach
1/4 cup pesto (buy pre-made or use my recipe)
1/2 cup good parmesan cheese
1/2 cup mozzarella
2 eggs
2 TBSP whole wheat flour
Pepper to taste
1. Preheat oven to 325º. Cook and drain your spinach. Transfer to a large mixing bowl and add pesto, cheese, egg, flour, and pepper.
2. Spray a bread pan with a little non-stick spray, or rub with a teaspoon of butter to prevent brownies from sticking. Pour batter into pan.
3. Bake your brownies for about 30 minutes. Cut into squares. These brownies are fantastic warm or cool. Bring a plate to your next event--you'll be the toast of the PTA!
Tuesday, March 31, 2009
Grandma's Good Homemade Bread
I grew up on this fantastic recipe developed by my Grandma (that's us in the kitchen together--if only I could still fit into that outfit.) My family always referred to this bread by its full four-part name; anything less would be sacrilege! The recipe has trickled down the Hart family line (which just happens to be infused with culinary genius;) some, like my Uncle Charlie, have managed to successfully tweak it, but I'm not brave enough to mess with something so perfect. Hell, I'm still trying to get the kneading-and-rising thing figured out.
This bread gets its nutritive qualities from the combination of whole wheat flour and wheat germ, which join forces on the fiber and protein fronts. Wheat germ is also high in vitamin E and folic acid (a B vitamin.) Sweetened with molasses and honey, this bread's touch of sweetness is easier on your body to process than that of baked goods made with refined sugar.
Ingredients (makes one large and two regular-sized loaves; after filling two bread pans, I shape the remaining dough into a big round loaf and bake it on a baking sheet):
2 packets active dry yeast, disolved in
3 cups water, lukewarm
1/2 cup canola oil
1/2 cup honey (or a mix of honey and molasses, depending on the contents of your pantry)
1 tsp salt
1 egg
3-1/2 cups whole wheat flour
3-1/2 cups unbleached white flour
1/2 cup wheat germ
plenty of extra flour to dust your hands and kneading surface
1. Dissolve yeast in water (temperature-test the water by pouring it over your wrist the same way you'd test a baby bottle.)
2. Sift flours with salt into a large mixing bowl and add the rest of the ingredients. Mix gently but thoroughly--you don't want any remaining flour patches.
3. Now comes the kneading. I like to do this in two parts, both because the dough is easier to deal with that way, and because measuring the elasticity of the dough I'm kneading against the unkneaded batter gives me a sense of how much more kneading I have to go. Whether you knead the dough all together or in portions, it takes about 10 minutes per batch to achieve desired elasticity. I write off the time commitment as good upper-body exercise, so throw your shoulders into it!
4. Return dough to the bowl and cover it with a towel. Allow it to rise until it has doubled in size--this will probably take between 45 minutes and an hour. Make sure the bread is not rising in a drafty area; if your kitchen is cool, you can stick the bowl in the oven to protect it from drafts. In the meantime, lightly grease the bread pans with a little butter or non-stick spray.
5. Preheat oven to 350º. When the dough has risen sufficiently, punch it down to release the big air bubbles and knead it once or twice. Transfer dough to the bread pans (and baking sheet, if you're using my trick.) Allow the dough to rise again, ideally doubling in size again and rising to the tops of the pan centers. (
6. When the bread has finished its second rising stint, it's finally ready to bake. This will take about 40-45 minutes; bake the loaves until they've turned light brown, but don't let them dry out!
If you wrap your bread well in foil, it will keep for quite awhile without loosing moisture. You can also freeze part of your batch for later if you can't eat it all in about a week. Ideally served fresh out of the oven or toasted and spread with a little olive oil, pumpkin butter, or jam, this bread is also great for sandwiches or as a side with soup or salad!
Monday, March 30, 2009
Sopa de Batata para Bretaña
That's Spanish for "Sweet Potato Soup for Brittany," y'all!
I recently discovered the surprisingly delicious combo of black beans and sweet potato, so I thought I'd experiment a bit with this beautiful (and super-nutritious) marriage. Cilantro, my friend Brittany's favourite herb (she and I share a love of Mexican culinary delights,) had to be involved, so I chopped up plenty of this amazing-smelling greenery and put my spice collection to work in search of the perfect complementary flavours. The result of my experiment is a filling, good-for-you soup that holds its own as a satisfying meal.
This is only my second attempt at homemade soup, and I have to say, I'm pretty pleased with myself! Once you get started, it's hard to stop throwing things into the food processor. I set out with the goal of making a vegan version, but if you're feelin' spunky, you might wanna experiment adding some dairy (1/2 of skim milk, perhaps?)
In an attempt to water down my very thick concoction, I got brave and threw a little wine into the mix. This would've been a better idea if the bottle I had in the fridge was NOT a fruity pinot grigio; if I were you, I'd use something super dry like savignon blanc. If you don't have any wine on hand, no worries; I'm sure it'll be great without the spiking!
Sweet potatoes pack an insanely high content of vitamin A. They're also high in vitamin C and fiber, and contain significant amounts of of iron and calcium, which makes them an important dietary component for vegans and vegetarians. Top the soup with 1/2 cup of black beans, and you've got yourself a protein party! Good luck with your soup-making endeavors, I think you'll have fun experimenting. I want to hear all about your adventures!
Ingredients (makes 4 servings--great the next day for lunch!):
6 cups peeled sweet potatoes, coursely chopped (I used almost a full bag)
1/2 cup water
2 cups vegetable or chicken broth
1/4 cup very dry white wine
1/2 TBSP olive oil
1/4 tsp cumin
salt & pepper to taste
topping:
one can black beans, rinsed
2 cloves garlic, minced
2 TBSP cilantro (I like to snip mine into little pieces with scissors)
juice of 1/2 lime
optional toppings: grilled chicken strips, fat-free sour cream, hot sauce, crushed red pepper
1. Preheat oven to 400º. Peel and chop sweet potatoes. Place them on a 1"-deep baking sheet and drizzle them with 1/2 cup of water (this keeps them from drying out without the added fat of oil.) Roast the potatoes until they're soft to the touch--20 minutes should do the trick.
2. Mince the garlic and cilantro and throw them into a bowl with the rinsed beans. Squeeze the lime over the beans and stir well.
3. When the sweet potatoes are done, throw all of the soup ingredients into your blender or food processor and give it a whirl (depending on the size and power of your machine, you might need to blend your ingredients in two batches.)
4. Dish everything up all pretty-like. Ole!
Sunday, March 29, 2009
Treat Your Ticker: Almond-Encrusted Flounder with Pomegranate Sauce
This recipe is inspired by my dad's heart-healthy diet. Over the past few years, he has made pomegranate and unsweetened grape juices, red wine and oatmeal his everyday staples (the first three are known for being incredibly rich in antioxidants; oatmeal's high content of soluble fiber, along with its anti-inflammatory properties, help keep the heart in tip-top shape.)
As far as choosing seafood goes, wild-caught Alaskan salmon delivers the highest dose of omega-3's, an important inclusion in everyone's diet, but particularly necessary for those actively trying to prevent cardiovascular disease. Because salmon can have a high mercury content--particularly the farm-raised and Atlantic varieties--it's important to limit your consumption and supplement your omega-3 intake by eating things like ground flaxseed (add it to your oatmeal, Daddy!) and walnuts.
I had hoped to use halibut for this recipe because of its high potassium content (an essential nutrient for the cardiovascular system) but I wasn't able to find any. Halibut is easily interchangeable with other mild white fish like cod, tilapia and flounder, and we found a locally caught version of the latter (bonus points if you can tell me why it's important to buy local!!) Lean white fish like these varieties may not be as high in omega-3's as fatty fish, but you still receive some of the benefits.
Next up: pomegranate juice, the fruit world's biggest celebrity in recent years. Besides containing several times more antioxidants than green tea and other juices, pomegranate juice has been found to play a role in lengthening the time it takes for cancer to develop in those who already have it, and it also seems to increase blood flow to the heart, reduce arterial plaque and inhibit the oxidation of LDL (bad cholesterol.)*
Almonds add the finishing touch to this heart-tastic meal. The major heart-healthy nutritional component in almonds is their high level of monounsaturated fat, which is associated with cardiovascular health.* Have you heard of the Mediterranean diet? It's based on this type of fat, which, in addition to eating plenty of fiber and protein, helps keep you satiated so that you'll be less likely to overeat.
Though this recipe has a fancy-schmancy title, it's easy to make and can be done without breaking the bank; I spent $22 on ingredients and fed three people.
Sauce:
1 clove garlic, minced
2 cups pomegranate juice
1-1/2 TBSP honey
juice of 1/2 lime
zest of 1/2 lime
dash of olive oil for sauteeing garlic
Fish (makes 3-4 servings):
1 lb. flounder, halibut, cod, tilapia, or orange roughy (you can find the latter in the frozen foods section)
1/2 cup crushed almonds
1 cup panko (use crushed rice crackers for a gluten-free version) **
salt & pepper to taste
**A box of panko (Japanese bread crumbs) runs between $2.50 and $3.50. Most brands keep their recipes simple, making panko a healthier option (as it contains a significant amount of fiber, some protein, and minimal sodium, sugar & additives) than other types of bread crumbs. Not to worry if you don't already have some in your pantry and don't want to spend the extra bucks; I made a few pieces of fish using only crushed almonds and they were still yummy.
1. Preheat oven to 350 degrees. In a large deep frying pan, sautee garlic in a drop of olive oil. When garlic begins to brown, add juice, honey, lime and lime zest (if you don't have a zester, you can use the fine side of a cheese grater to grate the lime over the pan.
2. Cook sauce over medium heat, letting it simmer but not boil. When it has been reduced to about half of its original quantity (10-15 minutes,) turn off the heat. Set aside about 1/4 cup of sauce and add the fish to the pan with the remaining sauce. Allow it to soak for a minute or two.
3. In a large bowl, combine crushed almonds, panko, salt and pepper. Arrange your dipping station; you'll need the pan of fish, the panko-almond mix, and a baking sheet spread with a large piece of aluminum foil.
4. Coat each piece of fish with the panko-almond mix and transfer it to the baking sheet. Spoon the remaining sauce over the fish (keep the 1/4 cup you reserved separate.) Spread a second piece of foil over the fish and pinch the sides of the foil pieces together (this prevents the fish from drying out in the oven.)
5. Baking time will vary depending on the thickness of your fish. My flounder filets--which were very thin--took 15 minutes. To test for doneness, slice into the center of a filet; the fish should be white and flake easily. Spoon a little bit of the reserved sauce over each piece if you want an extra pomegranatey kick!
Healthy Girl Says: Serve this yummy fish over a bed of rainbow chard sauteed in garlic and a drop of olive oil. Chard is a dark leafy green that deserves more attention than it often receives; it is absolutely PACKED with fiber, calcium, potassium, beta-carotene, and vitamins A & C.
*This information comes from Dr. Jonny Bowden's "The 150 Healthiest Foods on Earth: The Surprisingly Unbiased Truth About What You Should Eat and Why," which is a great source of inspiration as well as a fantastic reference book. I highly recommend it!
Thursday, March 26, 2009
Katie's Feel-good Applejack Quesadillas
Havin a bad day? Me too, girl. I have a whole routine dedicated to tackling this problem, and it involves a lot of Mariah Carey, an empowering inner monologue (which often becomes an outer monologue if I'm home alone) and quesadillas!
I was having a bad day for most of 2003. Luckily, my downstairs neighbor, Katie, served as a live-in shoulder to cry on and on-call snack-maker. Our routine would go a little something like this: I would let myself into Katie's house via the back door, we'd chitchat about our day, I'd mention that I was hungry and accept her offer to make us a snack as if the idea never would have occurred to me. I'd offer the contents of my kitchen cabinet--which was usually two or three kinds of hot sauce and some celery salt--but the magic of the bad day snack cure was all in Katie's creativity. She's especially good at inventing new twists on the classic quesadilla, so I asked her for her favourite combo to share with y'all. Try it with a side of guilty-pleasure pop music, and your day is guaranteed to get better!
Ingredients (serves one; screw everyone else):
1 whole wheat tortilla
1/4 onion, sliced as thin as possible
1 granny smith apple, coursely chopped
1/2 a 6-oz. bag of spinach
1/4 cup shredded mozzarella or monteray jack
1 TBSP olive oil
2 tsp sugar
optional: diced chicken, light sour cream, and maybe a little guacamole? mmm!
1. Caramelize your onions. This is usually done with tons of butter and sugar, but Katie suggested using olive oil, and I found it worked well (and we all know olive oil is better for your heart.) Throw onions, oil and sugar into a pan and stir 'em up. The caramelization process takes at least 10 minutes and requires pretty frequent stirring, but you can leave 'em long enough to chop up your apple and wash your spinach.
2. When the onions have started to become translucent and the first sticky brown edges that characterize caramelization are beginning to form, throw your apples into the pan "just long enough to get them acquainted; they're not movin' in or nothin!" (says Katie.)
3. Set the apple-onion mixture aside and let the spinach have a turn. When it's wilted, add it to the apple and onion mixture.
4. Lay your quesadilla in the pan, sprinkle one half with cheese, add the veggie mix and fold the top over. Fry each side to your preferred melty crispness. Keep the music playing and sing away your troubles with your mouth full of quesadilla goodness!
Tuesday, March 24, 2009
Baked Pasta for Amy
My friend Amy has some crazy stomach problems going on, and she has to be very careful what she eats to prevent a seriously painful episode. She's trying to stay healthy and put some variety into her diet, so I've been coming up with yummy things her sensitive tummy can handle. Bread, cheese and veggies with low acidity get the go-ahead, so I threw together a simplified version of lasagna that anyone can enjoy. Feel free to experiment with the content of this dish--try adding your favourite veggies and maybe some veggie sausage or ground turkey (got some left over from Turkey meatloaf?)
I can't talk about Amy during Homage Week without mentioning her fabulousness, so as a serving suggestion for this Amylicious meal, I recommend throwing on some bling and donning your 4" Louboutin booties.
Ingredients:
1/2 box whole wheat spaghetti*
1/2 large eggplant, chopped
1 zucchini, chopped
1 yellow squash, chopped
1 bag frozen chopped spinach
1/2 bottle tomato sauce (omit if you're Amy)
1 bag shredded mozzarella (I used reduced fat, and it tasted alright but the consistency after baking was kinda weird)
1 tsp olive oil for cooking the veggies
salt, pepper, garlic powder and Italian seasoning to taste
*Go ahead and make the whole box of spaghetti if you like; in the next week, I'll feature 2 recipes you can make easily with pre-cooked spaghetti.
1. Preheat oven to 375 degrees and boil water for the pasta. Cook the spaghetti until it just barely turns al dente; you don't want it to get overcooked in the oven.
2. Thaw the spinach & chop up your veggies. You can either sautee or roast them while you wait for the pasta to be ready (I prefer roasting, both because it gives the veggies a nice flavour and it doesn't require standing at the stove.) If you do roast them, drizzle no more than a teaspoon of olive oil over the baking sheet, then mix the veggie pieces around to coat them on both sides. If you sautee them, use a non-stick pan and 1 tsp or less of olive oil (in either case, it is possible to omit the olive oil completely.)
3. Drain pasta and return it to its pot. Add cooked veggies and spinach to the pot along with a little tomato sauce and all the spices, and mix everything well. Transfer your concoction to a lasagna pan and top with shredded cheese.
4. Cover the pan with foil and bake for about 30 minutes. Remove the foil and brown the cheese for another 5-10. Reapply your Chanel lipstick and enjoy!
Subscribe to:
Posts (Atom)